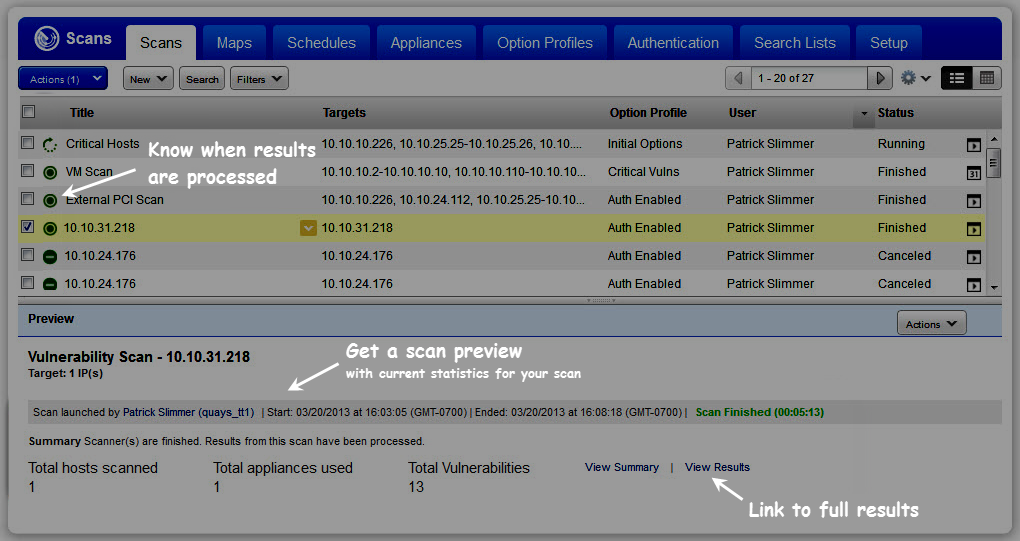
Once you launch your scan, you can see the progress of your scans and results in the scan list.
Go to your scans list to check on the scan progress. Once the scan is finished and the results have been processed you can run reports on the scan findings.

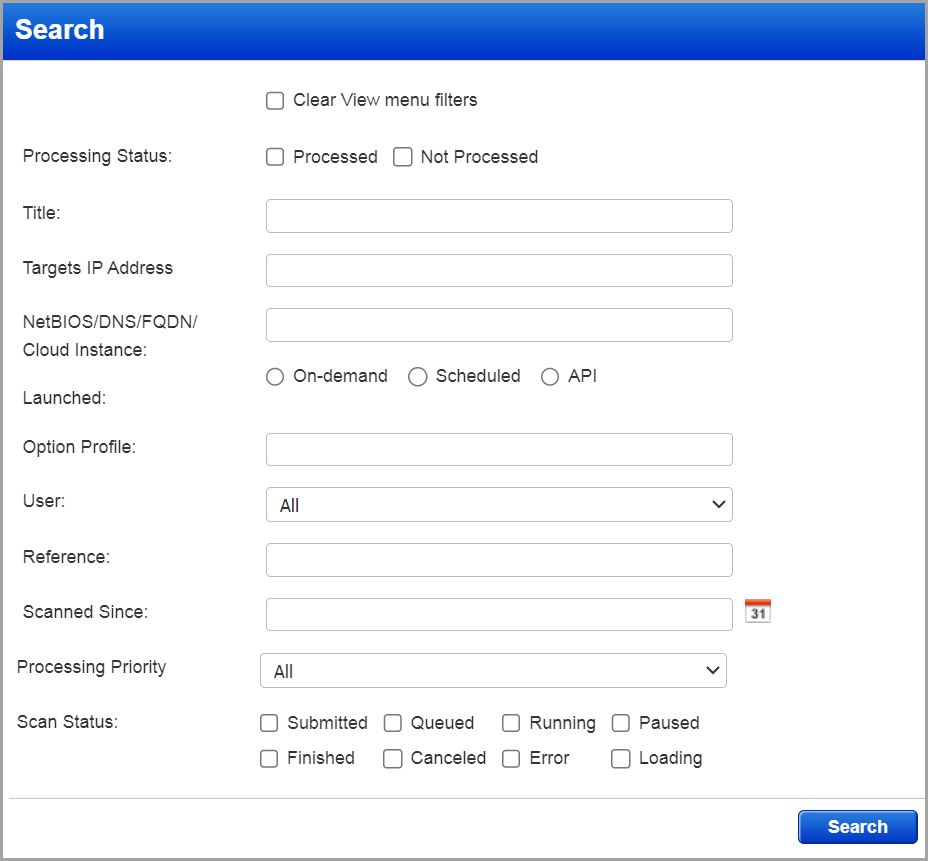
You can use the Search filter to view the scan as per your query.
1. Go to Scans tab > Scan > Search.

2. In the Search window, enter details for your search query.

The inputs are optional, you can choose to provide a search query based on your requirement.
|
Search Input |
Description |
|
Processing Status |
Select the scan based on processing status as Processed or Not Processed. |
|
Title |
Provide the title of the scan. |
|
Target IP Address |
Provide IP address. |
|
NetBIOS/DNS/FQDN/Cloud Instance |
Provide NetBIOS/DNS/FQDN/Cloud Instance |
|
Launched |
Choose the scan based on any of the following types - On-demand scan, - Scheduled scan - API |
|
Option Profile |
Provide the option profile. |
|
User |
Provide the user name from the list. Note: If you are a manager user, you can select one or ALL from the list of sub-users. |
|
Reference |
Provide the scan reference. |
|
|
Choose a date from the calendar to receive the scan list results from that time. |
|
Processing Priority |
Choose the processing priority. |
|
Scan Status |
Search the scans based on scan status such as : Submitted, Queued, Running, Paused, Finished, Canceled, Error, and Loading |